2015. 2. 12. 17:47

Create your first SOA Composite - Hello World ! Process


 Start JDeveloper.  Left click Applications node in the Applications Navigator and select New Application, as shown


Create an Application named Training.

Give “Training” in Application name

Select a suitable location and select SOA Application in the Application Template


The wizard now prompts you to create a project.  Later, you can add more projects to this application.

Give the project name as HelloWorld

Select Composite template as Composite with BPEL Process.  This is a convenient shortcut to tell that the composite we want to create would contain one BPEL process.  As an alternative, we can choose Empty Composite here,  add add a BPEL

 component later.

Click on Finish


A new dialog opens up.  This is to configure the BPEL component that we are adding to our composite.

Give name as HelloWorld_BPEL

Select Template as Synchronous BPEL Template and click ok.

 Templates are pre-defined structures provided by Oracle.  Essentially, by using a template, a few activities shall come by default, so that you are saved of the mundane steps of adding those activities.  It’s even possible to create your own custom templates.  As of now, we select the predefined template for a synchronous process.  A synchronous process is one which is expected to be comparatively short-lived (few seconds to minutes) and hence can be expected to return a response quite quickly.  So, the client invoking a synchronous process can afford to wait (and block) for the response to come back.


The following structure comes up.


This is the picture of the composite (more technically, it’s the design time view of composite.xml).  As you can see, it contains a servicecomponent called HelloWorld_BPEL and a binding component called helloworld_bpel_client.


Service components are the building blocks that you use to construct a SOA composite application. Examples - BPEL, Human Task, Business Rules, Mediators, Spring.


Bindingcomponentestablish a connection between a SOA composite and the external world.  They are categorized as Service binding component and Reference binding components.  Service binding components provide the entry point to the composite Reference binding components provides access to the external service in the outside

world.  Examples include JCA Adapters (FTP adapter, DB adapter, Apps adapter etc), HTTP Binding, Direct binding etc.

Double click on this component to open it up.


As you can see, there is an input coming from the helloworld_bpel_client service binding  (which represents any client that is invoking our BPEL process).  


Drag an Assign activity from the component palette on the right.


In this assign activity, we can add any number of “Copy rules”.  Copy rules allow us to copy values from a source variable to a target variable, or to assign result of an expression (say a concatenate operation or a square root operation) to a target variable.


We want to create an expression similar to

“Hello” + Input = Output.   

This we shall create using the following steps:

Expand output variable so that you can see client:result.  This is the string field to which we want to assign some value.

From the icons on top right corner, drag an expression  onto client:result.


A dialog called Expression Builder opens up.  Expression builder is a nifty tool to quickly create expressions.  It shows categories of operations.  You choose a category and it shows you the expressions within that category.   For example

Here we choose “concat” function from the String Functions category

Click on Insert into expression.  This puts the concat() into the Expression box above.  (When you get experienced, you can simply write functions directly here.).  Place the mouse cursor between “(“ and “)” of the concat function

Next we expand the input and select the client:input field.  This is the field that has got the value that was sent by the user.  We want to append hello to this and assign that to the output variable.  So choose this

Press Insert into expression

Type ‘Hello’ followed by a comma.    Note that in BPEL, (or more precisely xpath) we use single quotes for strings


Now press OK.  Control returns to Edit Assign dialog.  Now expand the outputVariablein the To section (right section) and select client:result field.  Press OK

This has completed the Assign activity.  For better readability we should always give descriptive names to activities.  


So double click on the text “Assign1” (not the icon) and give name as “Assign_Hello”  

The BPEL process is now complete !

Posted by 아도니우스
2015. 1. 8. 17:52

BPEL Persistence properties are used to control, when and how a process need to be dehydrated.

1. inMemoryOptimization

This property indicates to Oracle BPEL Server that this process is a transient process and dehydration of the instance is not required. When set to true, Oracle BPEL Server keeps the instances of this process in memory only during the course of execution. This property can only be set to true for transient processes (process type does not incur any intermediate dehydration points during execution).

  • false (default): instances are persisted completely and recorded in the dehydration store database for a synchronous BPEL process.
  • true: Oracle BPEL Process Manager keeps instances in memory only.


2. completionPersistPolicy


This property controls if and when to persist instances. If an instance is not saved, it does not appear in Oracle BPEL Console. This property is applicable to transient BPEL processes (process type does not incur any intermediate dehydration points during execution).

This property is only used when inMemoryOptimization is set to true.

This parameter strongly impacts the amount of data stored in the database (in particular, the cube_instance, cube_scope, and work_item tables). It can also impact throughput.

  • on (default): The completed instance is saved normally.
  • deferred: The completed instance is saved, but with a different thread and in another transaction, If a server fails, some instances may not be saved.
  • faulted: Only the faulted instances are saved.
  • off: No instances of this process are saved.

<component name="mySampleBPELComponent">
...
<property name="bpel.config.completionPersistPolicy">faulted</property>
<property name="bpel.config.inMemoryOptimization">true</property>
...
</component>


3. oneWayDeliveryPolicy


The oneWayDeliveryPolicy is from the Oracle 10g configuration property deliveryPersistencePolicy.The new configuration property name is bpel.config.oneWayDeliveryPolicy.

This property controls database persistence of messages entering Oracle BPEL Server. Its used when we need to have a sync-type call based on a one way operation. This is mainly used when we need to make an adapter synchronous to the BPEL Process.

By default, incoming requests are saved in the following delivery service database tables: dlv_message

  • async.persist: Messages are persisted in the database.
  • sync.cache: Messages are stored in memory.
  • sync: Direct invocation occurs on the same thread.


<component name="mySampleBPELProcess">
...
<property name="bpel.config.transaction" >required</property>
<property name="bpel.config.oneWayDeliveryPolicy">sync</property>
...
</component>


※ 참고사이트 : http://www.albinsblog.com/2012/04/persistence-properties-in-oracle-soa.html


--------------------------------------------------------------------------------------------------------------

#291 BPEL configuration properties

Rule of thumb for BPEL is - keep those processes short and sweet.
Transient, synchronous is the way to go, if possible.

ORCL docs provide for very good reading in this area - I recommend the FMW Developer Guide for SOA Suite, the FMW SOA Suite Administrators Guide as well as the FMW Performance Guide. The info below, has to a great extent, been taken from there. I also recommend AnTony Reynolds and Matt Wright's - Oracle SOA Suite 11g Developers Guide - available here


Tuning BPEL Engine Threads -


These are the guys who do the actual work -

The dspInvokeThreads property specifies the total number of threads allocated to process invocation dispatcher messages. Invocation dispatcher messages are generated for each payload received and are meant to instantiate a new instance. If the majority of requests processed by the engine are instance invocations (as opposed to instance callbacks), greater performance may be achieved by increasing the number of invocation threads. Higher thread counts may cause greater CPU utilization due to higher context switching costs.


The dspEngineThreads property specifies the total number of threads allocated to process engine dispatcher messages. Engine dispatcher messages are generated whenever an activity must be processed asynchronously. If the majority of processes deployed are durable with a large number of dehydration points (mid-process receive, onMessage, onAlarm, and wait activities), greater performance may be achieved by increasing the number of engine threads. Note that higher thread counts can cause greater CPU utilization due to higher context switching costs.

The dspSystemThreads property specifies the total number of threads allocated to process system dispatcher messages. System dispatcher messages are general clean-up tasks that are typically processed quickly by the server (for example, releasing stateful message beans back to the pool). Typically, only a small number of threads are required to handle the number of system dispatch messages generated during run time.

Start off with the defaults, and tune - if necessary - paying attention to the heuristics above.

These properties can be set in EM. 


As you can see, the Audit Level is set to Inherit as default. Please see my My Post on Logging for more info.

Here is the doc -


For production systems - use Production or Error - depending on your logging requirements.

Audit Detail threshold - under the threshold? - details store in the audit_trail table.
over the threshold? then audit info will be written to the audit_details table.

Large Doc Threshold - same concept -

This is the maximum size (in kilobytes) of a BPEL variable before it is stored in a separate location from the rest of the instance scope data.

Payload Validationvalidates incoming and outgoing XML documents 
Incurs a performance hit.


Other Configuration properties


Now let's look at the rest -


As you can see, the descriptions shown in EM are useful and succinct.
You will not change most of these, however - some are worth investigating -


For one way invokes with possible callbacks -

Per default requests to execute a BPEL process are written to the soa_infra.dlv_message table - this causes a message to be generated that is then picked up by a worker thread which then starts executing the process.

Big benefit - Reliability no requests get lost - however we do have an extra DB write.

If set to async.cache then the request is cached in-memory - better Performance

If set to sync -> queuing is bypassed, and the BPEL process is invoked synchronously.
Client has full control of what happens.


1. bpel.config.oneWayDeliveryPolicy
Default value specified in MBean - accessible from em


async.persist: Messages are persisted in the database hash map.
sync.cache: Messages are stored in memory.
sync: Direct invocation occurs on the same thread.

Can be overwritten in the BPEL process definition in composite.xml -


onewayDeliveryPolicy=sync
and
transaction=required
BPEL process runs in the same thread and the same transaction.

onewayDeliveryPolicy=sync
and
transaction=requiresNew
BPEL process runs in the same thread but within a new transaction.

completionPersistPolicy


Here you need to ask yourself, whether the instance data needs to be persisted, and if so to what extent.
If your BPEL process integrates System A with System B. then the fact that the data has been successfully written to B suffices.

Simple example -

here is my one-way BPEL process that writes its input to a file -


Test - here is the output order.


Here is the em trace -


Now I set the the completePersistPolicy to off in composite.xml -
I also need to set inMemoryOptimization = true


Re-test - my output file has been written.

Check the audit trail in em -


Probably faulted would be the best setting here.

The SyncMaxWaitTime property sets the maximum time the process result receiver
waits for a result before returning. Results from asynchronous BPEL processes are
retrieved synchronously by a receiver that waits for a result from Oracle BPEL Server.
The default value is 45 seconds.

If you have sync BPEL processes and you see the need to up this property, then consider making the processes async.

MaxRecoverAttempt - number of times to attempt recovery of invoke/callback messages.

The recovery behavior for invoke and callback messages is different when
MaxRecoverAttempt is set. For example, assume MaxRecoverAttempt is set to 4.
■ Invoke message recovery is retried 4 (N) times before moving the message to
the exhausted state.
■ Callback message recovery is retried 5 times (N + 1) before moving the
message to the exhausted state.
This is the expected behavior. The first attempt is not counted as a recovery
attempt. The recovery attempts are incremented by the BPEL process service
engine. If MaxRecoverAttempt is set to 1, you see one default resolution process
and then one recovery attempt.

Recovery Configuration


This feature is detailed in the Administrator’s Guide for Oracle SOA Suite and Oracle
Business Process Management Suite


e.g. We are trying to update a DB and it is temporarily unavailable.

This covers -
All activities (for example, wait activities and OnAlarm branches of pick activities)
that have an associated expiration date and are scheduled with the SOA
Infrastructure to be rescheduled
■ All activities that are not complete over a provided threshold time

■ All invoke and callback messages that are unresolved


When should auto-recovery be available?
Check out the RecurringScheduleConfig - set start/stopWindowTime

Check out StartupScheduleConfig -
the default config tells us -

maxMessageRaiseSize The maximum number of messages to submit for each startup
recovery attempt. Use this property to limit the impact of recovery on the server. This value specifies the maximum number of messages to filter from activity, invoke, and callback
queries; that is, 50 messages from each of the activity, invoke, and callback tables.

startupRecoveryDuration -
Specifies the number of seconds that the startup recovery period
lasts. After the server starts, it goes into a startup recovery
period. During this period, pending activities and undelivered
callback and invocation messages are resubmitted for
processing.
The default value is 600 (ten minutes). A negative or zero value
disables startup recovery.


Partner Link Properties

The main ones ares -

nonBlockingInvoke=true
PartnerLink Service will executed in a separate transaction.

idempotent=false
Executes on same Thread/transaction


Posted by 아도니우스
2014. 11. 24. 13:59

Creating a Simple BPEL Process : HelloWorld BPEL

Business Process Execution Language(BPEL) is an execution language for defining business processes. In short, it is the language for orchestrating multiple WebServices based on the business logic.

This post is about creating your first BPEL process using Oracle SOA Suite 11g

This is a simple BPEL process that gives back fullName as response, inputs being firstName & lastName


Defining your first BPEL Process
Create a new Project, name it HelloWorldBPELPrj and select Empty Composite in the next screen'
Define a Schema as follows
In the composite file, drag and drop BPEL Processcomponent from the Component Palette into the Components swimlane of the composite.xml
This will open up a wizard where you need to give the following details
Name : HelloWorldBPEL
Template : Syncrhonous BPEL Process
Select Input and Outputfrom the schema just created
Select the checkbox "Expose as a SOAP WebService" so that it creates a WebService with the same message types in the External References section of the composite.xml, though which external clients talk to this BPEL process


This will create the following in the composite.xml

Now that you've created the skeleton, lets implement the BPEL process.
Either open the .bpel file from the Navigator or double click the BPEL process icon in the coposite.xml - this will take you to the BPEL Component Editor where you'll implement the business logic in the BPEL process

When you look at the empty BPEL process, you'll find an incoming line from the external WS to Receive Activity, and an outgoing line from Reply Activity to the same external WS. These lines represent the flow of message to and from the WS to the BPEL Process

Note : Every operation in a BPEL process is called an Activity

Click on the "X" symbol in the boundary enclosing both the activities. The boundary is called a Scope in BPEL, which is similar to Scope in any programming language
This will open up variables section, where you'll see 2 variables (inputVariable and outputVariable). The inputVariable contains the the value coming into the BPEL process from the external WS.
In this example, inputVariable contains just a simple string, name
We need to concatenate this with 'Hello ' and assign it to the output variable. This can be done using Assign activity


Drag and drop Assign activity in between the two activities, name it AssignOutput


Here, we need to concatenate both the elements from the input and assign it to the output.  


For this, click on the
Expression icon at the top right as shown


Use the concat() function from the String functions and append Helloto the name from the inputVariable, as shown


This will create a function icon in the middle of the Assing editor, where you need to drag this to assign it to the returnMsg of the outputVariable and click OK


With this, the outputVariable is stuffed which is sent back to the calling WS(indicated the outgoing line)
Thats it, you are done with your first BPEL process
Deploy the project as per this linkand test it in Enterprise Manager

Hope this tutorial gave you a basic understanding on working with a BPEL process.
Thanks for going through my post, feel free to provide a feedback!


※ 참고사이트 : http://middlewareschools.com/bpel-in-helloworld

                      https://chendamok.wordpress.com/2013/10/19/soa-bpel-project-helloworld/ (SOA BPEL Project : HelloWorld)

Posted by 아도니우스
2014. 10. 20. 17:07

Transaction timeout can be configured for BPEL in 11g using the below properties.

※ JDeveloper Setting : Windows - Preferences - SOA - C:\Oracle\MiddleWare2\jdeveloper\lib\aia.jar


1. SyncMaxWaitTime

Description : The maximum time a request/response operation will take before ti times out. The default value is 45 seconds.

Maximum time BPEL process wait before returning result to client(or another Sync process)

To set this property

a. Login to EM console

b. Expand SOA and right click on “soa-infra”

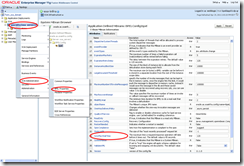
c. From context menu, select SOA Administration –> BPEL properties

d. Click on “More BPEL Configuration properties…”

SyncMaxWaitTime


2.Transaction Time-out for BPEL EJB’s

The following EJB’s need to be configured for transaction time outs.

  • BPELActivityManagerBean
  • BPELDeliveryBean
  • BPELDispatcherBean
  • BPELEngineBean
  • BPELFinderBean
  • BPELInstanceManagerBean
  • BPELProcessManagerBean
  • BPELSensorValuesBean
  • BPELServerManagerBean

To change time out for these beans ,

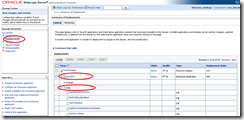
a. Login to Administration Console

b. Click on Deployments

c. Expand soa-infra –> EJB’s

Transaction-EJB1of3 Transaction-EJB2of3

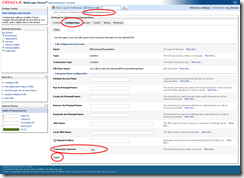
d. Click on EJB for which you want to change the timeout

e. Click on Configuration

f. Change value for field “Transacion Timeout”

g. Click Save.

Transaction-EJB3of3


3. Global Transaction Timeout

This property is timeout in seconds for active transactions. After this time, if the transaction is still “Active”, then it gets rolled back.

To change this value

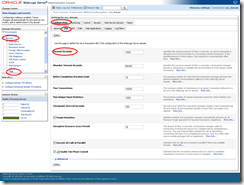
a. Login to Administration Console

b. Expand “Services” –> Click on “JTA”

c. Click on “JTA” tab if it’s on a different tab

d. Change value for field “Timeout Seconds”

GlobalTransactionTimeout

Very Important :

SyncMaxWaitTime < BPEL EJB's transaction timeout < Global Transaction Timeout


Restart Weblogic server .

Posted by 아도니우스
2014. 9. 24. 18:33
1. RDA for weblogic
-----------------------
RDA is shipped with Oracle Fusion Middleware 11g. You will find it in two places
  • MW_HOME/ORACLE_SOA/rda
  • MW_HOME/oracle_common/rda

RDA has two phases, setup and run. Setup needs to done one time, In which RDA will ask several Questions.
It will store those answers in setup.cfg file in the same directory from where you are running rda.
Once setup is done, subsequent runs will use the information in setup.cfg

KM note 1352181.1 describes all questions asked for the SOA module.

Running RDA for weblogic Server:
Go to your domain home/bin directory and set:
. ./setDomainEnv.sh

Go to MW_HOME/oracle_common/rda
Here first time you need to run:

Use the following RDA command for setup - no security filter:
Unix:
rda.sh -S -p WebLogicServer

MS Windows:
rda.cmd -S -p WebLogicServer


2. RDA Health Check : ./rda.sh -HCV

Posted by 아도니우스
2014. 9. 19. 09:31

Oracle SOA Suite 11g, Resequence messages in Mediator


“A Resequencer is used to rearrange a stream of related but out-of-sequence messages back into order. It sequences the incoming messages that arrive in a random order and then send them to the target services in an orderly manner. The sequencing is done based on the sequencing strategy selected.”
For the resequencer to work we need to have 2 values in the source payload. The first one is a sequenceID, and the next one is a groupdID. The sequenceID will be used as identifier for the message itself. The groupID will be used to group the messages in which the resequencer will rearrange the messages based on the sequenceID. Different groups will have seperate processing, so they won’t have any influence on each other.
The mediator supplies us 3 types of resequencers :
  • Standard Resequencer
  • FIFO Resequencer
  • BestEffort Resequencer


Let’s test the first one.
For this i created the next composite

In here i just map the input of the process 1on1 to the File adapter, which will store the input of the process on filesystem.
Interface of the composite
01 <?xml version="1.0" encoding="UTF-8"?>
02 <schema attributeFormDefault="unqualified"
03 elementFormDefault="qualified"
06 <element name="process">
07 <complexType>
08 <sequence>
09 <element name="empID" type="string"/>
10 <element name="empType" type="string"/>
11 <element name="empName" type="string"/>
12 </sequence>
13 </complexType>
14 </element>
15 <element name="processResponse">
16 <complexType>
17 <sequence>
18 <element name="result" type="string"/>
19 </sequence>
20 </complexType>
21 </element>
22 </schema>


Configuration of the sequencer

Doubeclick the mediator component in the composite.

For the Resequence Level we can select ‘operations’ or ‘component’.
For Mediator components which only have 1 operation it doesn’t matter which one we select. For a Mediator component which consists of more then 1 operation and selecting the ‘component’ option means resequencing is applied to all operations in it. For this test we selected the ‘component’ option and used the ‘Standard’ mode.
Now we have several options to configurate the resequencer.
  • Group – xpath expression to the field in the payload which the resequencer will use to group our incoming messages
  • ID – xpath expression to the field which will uniquely identify our message
  • Start – Start value of the ID in the incoming message
  • Increment – Value which will be used for the increment of the id field in the upcoming messages
  • Timeout – Time to wait before a following expected message arrives at the Mediator component
And that’s it what is needed for the configuration of the ‘Standard’ resequencer.


Test

To test this scenario i will use the following 3 messages.
1 <soap:Envelope xmlns:soap="http://schemas.xmlsoap.org/soap/envelope/">
3 <ns1:process>
4 <ns1:empID>1</ns1:empID>
5 <ns1:empType>IT</ns1:empType>
6 <ns1:empName>Eric</ns1:empName>
7 </ns1:process>
8 </soap:Body>
9 </soap:Envelope>
1 <soap:Envelope xmlns:soap="http://schemas.xmlsoap.org/soap/envelope/">
3 <ns1:process>
4 <ns1:empID>2</ns1:empID>
5 <ns1:empType>IT</ns1:empType>
6 <ns1:empName>John</ns1:empName>
7 </ns1:process>
8 </soap:Body>
9 </soap:Envelope>
1 <soap:Envelope xmlns:soap="http://schemas.xmlsoap.org/soap/envelope/">
3 <ns1:process>
4 <ns1:empID>3</ns1:empID>
5 <ns1:empType>IT</ns1:empType>
6 <ns1:empName>Theo</ns1:empName>
7 </ns1:process>
8 </soap:Body>
9 </soap:Envelope>
Go to the console > soa_domain > SOA > soa-infra > > and Test it.
If we trigger the process 3 times with the payloads as we describes and in the same sequence, the instances will all complete and write the files to filesystem in the same sequence.

We used the ‘Standard’ mode and selected empID for sequence-value and emptType for group-value, and the sequence should start with 1 and will increment by 1.
Now switch the last 2 messages in the sequence and see what happens. Since we’re trying to process and already processed message again we will get the next errormessage
1 The selected operation execute could not be invoked.
2 An exception occured while invoking the webservice operation. Please see logs for more details.
3 oracle.sysman.emSDK.webservices.wsdlapi.SoapTestException: oracle.tip.mediator.infra.exception.MediatorException: ORAMED-03003:[Storing Resequencer Group Failed]Unable to store Resequencer Group." oracle.tip.mediator.common.persistence.MediatorResequencerMessage, mediator InstanceId=E07531315F8511DFBFBF3B164F19FDA3, componentDn=default/MyReSequence!1.0/Mediator1, operation=execute, groupId=IT, sequenceId=1, status=0"Possible Fix:Unable to store Resequencer Group. Check your Database connection or check data
So change all empType to ‘HR’ instead of ‘IT’.
For example
1 <soap:Envelope xmlns:soap="http://schemas.xmlsoap.org/soap/envelope/">
3 <ns1:process>
4 <ns1:empID>1</ns1:empID>
5 <ns1:empType>HR</ns1:empType>
6 <ns1:empName>Eric</ns1:empName>
7 </ns1:process>
8 </soap:Body>
9 </soap:Envelope>
The sequence we’re now going to use is empID=1, empID=3, empID=2
After sending the second message (empID=3), you will notice the instance won’t complete. Because the resequencer expects an empID=2. In this case it will wait till this message arrives.
1 <soap:Envelope xmlns:soap="http://schemas.xmlsoap.org/soap/envelope/">
3 <ns1:process>
4 <ns1:empID>2</ns1:empID>
5 <ns1:empType>HR</ns1:empType>
6 <ns1:empName>Eric</ns1:empName>
7 </ns1:process>
8 </soap:Body>
9 </soap:Envelope>


Now use the last test message (empID=2) and see what happens.

Instance 30030 changes from Running to Completed. This is because it received the next message in the sequence (empID=2), and after that the instance 30030 (empID=3) could continue.
If we check the files on filesystem we also see (compair the datetime of the files) that the files are stored in the correct sequence.


Other Resequencers

Besides the ‘Standard’ resequencer wel also have the ‘FIFO’- and the ‘BestEffort’ resequencer.
See this document to decide what resequencer suits best for your case.

Oracle SOA Suite 11g and the new Partitions feature

In the old school Oracle SOA Suite we had the functionality to create different domains in the BPEL Console to group our applications.
This functionality was gone in the 11g SOA Suite, and because it still was a wanted feature, Oracle reintroduced it as feature in the new Oracle SOA 11g Patchset2.
Now it’s called ‘Partitions’.
So let’s see how to manage them.
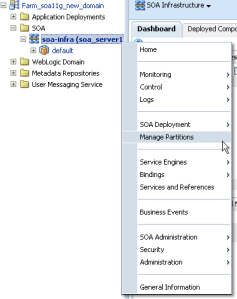
Go to the Enterprise Manager (http://localhost:7001/em), Farm_ > SOA > soa-infra (soa_server1).
Right mouseclick on soa-infra > Manage Partitions. Create the new partition. (SOA Partition 별, Composite count 알 수 있음)


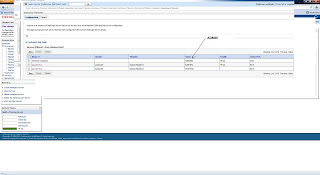
The new partition should be added to the list (beneath the default partition).
JDeveloper
In JDeveloper we will create a simple SOA Composit application.
Deploy the new application and now in the wizard of the deployment when we select a server it gives us a new selectbox to select the newly created partition. By default it will use the ‘default’ partition.

Deploy the application and let’s go back to the console.
Now we will see the new deployed application in the list of the ‘test_partition’ partition.


Using ant

ant-sca-mgmt.xml createPartition – Creates a partition in the SOA Infrastructure.
Location of the file :
1 <ORACL_MIDDLEWARE_HOME>/bin
ant -f ant-sca-mgmt.xml createPartition -Dhost=localhost -Dport=8001 -Duser=weblogic -Dpassword=weblogic -Dpartition=my_ant_partition
01 Buildfile: ant-sca-mgmt.xml
02 [echo] oracle.home = E:\oraclehome\11g\middleware\Oracle_SOA1\bin/..
03
04 createPartition:
05 [input] skipping input as property host has already been set.
06 [input] skipping input as property port has already been set.
07 [input] skipping input as property user has already been set.
08 [secure-input] skipping secure-input as property password has already been set.
09 [input] skipping input as property partition has already been set.
10 [echo] oracle.home = E:\oraclehome\11g\middleware\Oracle_SOA1\bin/..
11
12 folderMgrTask:
13 [java] calling FolderManager.initConnection(), m_host=localhost, m_port=8001, m_user=weblogic
15 [java] connection initiated
16 [java] folderMBean=oracle.soa.config:name=soa-infra,j2eeType=FolderLifecycleConfig,Application=soa-infra
17 [java] Partition (my_ant_partition) is successfully created.
18
19 BUILD SUCCESSFUL
And the partitions list in the console


Weblogic

  1. Managed Servers are on Admin state instead of Running state

During start up managed servers from admin console result in Admin State instead of Running State (see the screenshot below). This issue comes up usually when Weblogic is unable to connect to infrastructure database. Usually this is happening when the infrastructure database's listener is not down after reboot or server configuration change. In Windows make sure oracle services are up and the database EM console is accessible


XSD


Introduction
Those who deal with data transfer or document exchange within or across organizations with heterogeneous platforms will certainly accept and appreciate the need and power of XML. I am not going to delve into the merits of XML. I will, however, address a simple but powerful schema concept called XSD or XML Schema Definition.
  • What is XSD Schema?
  • What are the advantages of XSD Schema?
  • What is important in XSD Schema?
What Is a Schema?
A schema is a "Structure", and the actual document or data that is represented through the schema is called "Document Instance". Those who are familiar with relational databases can map a schema to a Table Structure and a Document Instance to a record in a Table. And those who are familiar with object-oriented technology can map a schema to a Class Definition and map a Document Instance to an Object Instance.
A structure of an XML document can be defined as follows:
  • Document Type Definition (DTDs)
  • XML Schema Definition (XSD)
  • XML Data Reduced (XDR) -proprietary to Microsoft Technology
We are specifically going to work with XML Schema Definitions (XSD).
What Is XSD?
XSD provides the syntax and defines a way in which elements and attributes can be represented in a XML document. It also advocates that the given XML document should be of a specific format and specific data type.
XSD is fully recommended by W3C consortium as a standard for defining an XML Document. To know more about latest information on XSD, please refer the W3C site (www.w3.org).
Advantages of XSD
So what is the benefit of this XSD Schema?
  • XSD Schema is an XML document so there is no real need to learn any new syntax, unlike DTDs.
  • XSD Schema supports Inheritance, where one schema can inherit from another schema. This is a great feature because it provides the opportunity for re-usability.
  • XSD schema provides the ability to define own data type from the existing data type.
  • XSD schema provides the ability to specify data types for both elements and attributes.
Case Study
ABC Corp. a fictitious software consultancy firm, which employs around 25 people, has been requested by its payroll company to submit employee information, which includes the Full Time and Part Time consultants, electronically in an XML format to expedite payroll processing.
The Payroll Company told ABC Corp. the following information will be needed for the Full Time and Part Time Employees.

Employee Information

SSN
Name
DateOfBirth
EmployeeType
Salary
Here is the actual XML document for the above information.

<?xml version="1.0" ?>
- <Employees xmlns="http://www.abccorp.com" xmlns:xsi="http://www.w3.org/2001/XMLSchema-instance"
xsi:schemaLocation="http://www.abccorp.com/employee.xsd">
- <Employee>
<SSN>737333333</SSN>
<Name>ED HARRIS</Name>
<DateOfBirth>1960-01-01</DateOfBirth>
<EmployeeType>FULLTIME</EmployeeType>
<Salary>4000</Salary>
</Employee>
</Employees>

Here is the XML Schema for the above Employee Information

<xsd:schema xmlns:xsd="http://www.w3.org/2001/XMLSchema">
<xsd:element name="Employee"
minOccurs="0"
maxOccurs="unbounded">
<xsd:complexType>
<xsd:sequence>
<xsd:element name="SSN="xsd:string>
<xsd:element name="Name" type="xsd:string"/>
<xsd:element name="DateOfBirth" type="xsd:date"/>
<xsd:element name="EmployeeType" type="xsd:string"/>
<xsd:element name="Salary" type="xsd:long"/>
</xsd:sequence>
</xsd:complexType>
</xsd:element>
</xsd:schema>

Let's examine each line to understand the XSD Schema.
Schema Declaration
For an XSD Schema, the root element is <schema>. The XSD namespace declaration is provided with the <schema > to tell the XML parser that it is an XSD Schema.

<xsd:schema xmlns:xsd="http://www.w3.org/2001/XMLSchema">

The namespace that references an XSD Schema is the W3C recommended version of XSD. The "xsd:" prefix is used to make sure we are dealing with XSD Schema, but any prefix can be given.
Element Declaration
"Element" is the important part of the schema because it specifies the kind of information. The following element declaration in our example is going to deal with Employee information.

<xsd:element name="Employee"
minOccurs="0"
maxOccurs="unbounded">

An "element" declaration in XSD should have the following attributes.
name: This attribute specifies the name of an element. "Employee" in our example.
type: This attribute refers to Simple Type or Complex Type, which will be explained very soon in this article.
minoccurs: This attribute will specify how many elements at a Minimum will be allowed. The default is '0", which means it is an optional element.
Assume that minoccurs attribute carries a value of "1". This would mean the "Employee" element should be specified at least once in the XML document.
maxoccurs: This attribute will specify how many elements at a Maximum will be allowed in an XML document. Assume that maxoccurs attribute carries a value of "2". This would mean the "Employee" element should NOT be specified more than twice.
To summarize, let's say the minoccurs is "1" and maxoccurs is "2" for the "Employee" element. This means there should be atleast one instance of the "Employee" element in the XML document, but the total number of instances of "Employee" element shouldn't exceed two.
If you tried passing three instances of "Employee" element in the XML document, the XML parser will throw an error.
To allow the "Employee" element to be specified an unlimited number of times in an XML document, specify the "unbounded" value in the maxoccurs attribute.
The following example states that the "Employee" element can occur an unlimited number of times in an XML document.

<xsd:element name="Employee"
minOccurs="0"
maxOccurs="unbounded">

Complex Type
An XSD Schema element can be of the following types:
  • Simple Type
  • Complex Type
In an XSD Schema, if an element contains one or more child elements or if an element contains attributes, then the element type should be "Complex Type"

<xsd:complexType>
<xsd:sequence>
<xsd:element name="SSN="xsd:string>
<xsd:element name="Name" type="xsd:string"/>
<xsd:element name="DateOfBirth" type="xsd:date"/>
<xsd:element name="EmployeeType" type="xsd:string"/>
<xsd:element name="Salary" type="xsd:int"/>
</xsd:sequence>
</xsd:complexType>

The Employee element has SSN, Name, Date of Birth, Salary and Employee type, which are specified as child elements. As a result Employee Element must be defined as a Complex Type because there are one or more elements under Employee element.
xsd:sequence
The <xsd:sequence> specifies the order in which the elements need to appear in the XML document. This means the elements SSN, Name, DateOfBirth, EmployeeType and Salary should appear in the same order in the XML document. If the order is changed, then the XML parser will throw an error.
Simple Type
In an XSD Schema an element should be referred to as a Simple Type when you create a User Defined type from the given base data type.
Before going further into Simple Types, I would like to mention that XSD provides a wide variety of base data types that can be used in a schema. A complete description of the data types is beyond the scope of this article.
I would suggest reading at the following Web sites to learn more about data types.
  • http://www.w3.org
  • http://msdn.microsoft.com search for XSDs.
Some of the base data types, which we used in the "Employee" element examples, are:
  • xsd:string
  • xsd:int
  • xsd:date
Knowing that Simple Type Elements can specify User-defined data types in XML Schema, the real question is how do we know where to use a specific Simple Type?
Let's take a look at the schema again.

<xsd:complexType>
<xsd:sequence>
<xsd:element name="SSN="xsd:string>
<xsd:element name="Name" type="xsd:string"/>
<xsd:element name="DateOfBirth" type="xsd:date"/>
<xsd:element name="EmployeeType" type="xsd:string"/>
<xsd:element name="Salary" type="xsd:int"/>
</xsd:sequence>
</xsd:complexType>

Assume the Payroll processing company wants the social security number of the employees formatted as "123-11-1233".
For this we will create a new data type called "ssnumber".
The following is the code to accomplish the above requirement.

<xsd:simpleType name="ssnumber">
<xsd:restriction base="xsd:string">
<xsd:length value="11">
<xsd:pattern value="\d{3}\-\d{2}\-\d{4}"/>
</xsd:restriction>
</xsd:simpleType>

To start with, we should provide the name of the Simple Type, which is "ssnumber".
The restriction base specifies what is the base data type in which we derive the User Defined Data type, which is the "string" data type in the above example.
To restrict the social security number to 11 characters, we require the length value to be "11".
To ensure the social security number appears in the "123-11-1233" format, the pattern is specified in the following format.

<xsd:pattern value="\d{3}\-\d{2}\-\d{4}"/>

To explain the pattern,
\d{3} specifies that there should be three characters in the start. Followed by two characters after the first "-" and finally followed by four characters after the second "-".
Incorporating Simple Types into Schema
Now that we know what Simple Type means, let us learn how to effectively incorporate Simple Type into an XSD Schema.
First of all, Simple Types can be global or local.
Let's first look at global usage of Simple Type Element "ssnumber".

<xsd:schema xmlns:xsd="http://www.w3.org/2001/XMLSchema">
<xsd:element name="Employee"
minOccurs="0"
maxOccurs="unbounded">
<xsd:complexType>
<xsd:sequence>
<xsd:element name="SSN= type ="xsd:ssnumber>
<xsd:element name="Name" type="xsd:string"/>
<xsd:element name="DateOfBirth" type="xsd:date"/>
<xsd:element name="EmployeeType" type="xsd:string"/>
<xsd:element name="Salary" type="xsd:int"/>
</xsd:sequence>
</xsd:complexType>
</xsd:element>


<xsd:simpleType name="ssnumber">
<xsd:restriction base="xsd:string">
<xsd:length value="11">
<xsd:pattern value="\d{3}\-\d{2}\-\d{4}"/>
</xsd:restriction>
</xsd:simpleType>


</xsd:schema>

In the above example, the child element name "SSN" of parent element "Employee" is defined as user defined data type "ssnumber".
The Simple Type element "ssnumber" is declared outside the Employee element, which means if we have to define another element, say for ex. "Employer" inside the <xsd:schema>, then the "Employer" element can still make use of the "ssnumber" data type if it's needed.
Let's examine a different case where the Simple Type element "ssnumber" will be specific to Employee, and it is not going to be needed elsewhere at all. Then the following schema structure accomplishes this.

<xsd:schema xmlns:xsd="http://www.w3.org/2001/XMLSchema">
<xsd:element name="Employee"
minOccurs="0"
maxOccurs="unbounded">
<xsd:complexType>
<xsd:sequence>
<xsd:element name="SSN="xsd:string>


<xsd:simpleType>
<xsd:restriction base="xsd:string">
<xsd:length value="11">
<xsd:pattern value="\d{3}\-\d{2}\-\d{4}"/>
</xsd:restriction>
</xsd:simpleType>


<xsd:element name="Name" type="xsd:string"/>
<xsd:element name="DateOfBirth" type="xsd:date"/>
<xsd:element name="EmployeeType" type="xsd:string"/>
<xsd:element name="Salary" type="xsd:int"/>
</xsd:sequence>
</xsd:complexType>
</xsd:element>
</xsd:schema>

In the above example, all restrictions such as max length, pattern and base data type are declared inline, and it immediately follows the SSN element.
Understanding Schema Flexibility
So far we have seen how to create a schema by:
a. Declaring and Using Complex Element Type
b. Declaring and Using Simple Element Type
c. Understanding Global scope and Local scope of a given element
I will now explain the flexibility XSD Schema can provide by extending our schema example.
Let's validate further by adding a "FullTime" or "PartTime" Employee Type element.
To provide the validation, we should create a Simple Element Type called "emptype".

<xsd:simpleType name="emptype">
<xsd:restriction base="xsd:string">
<xsd:enumeration value="fulltime"/>
<xsd:enumeration value="parttime"/>
</xsd:restriction>
</xsd:simpleType>

The above schema will successfully create a Simple Type element with base type as "string" data type. The enumeration values are specified in enumeration attributes, which will basically restrict within two values. The enumeration attributes in an XSD Schema provides the ability to define an element in such a way that it should fall between the values given in the enumeration list.
Let us incorporate emptype Simple Type element in our main Employee schema.

<xsd:schema xmlns:xsd="http://www.w3.org/2001/XMLSchema">
<xsd:element name="Employee"
minOccurs="0"
maxOccurs="unbounded">
<xsd:complexType>
<xsd:sequence>
<xsd:element name="SSN="xsd:ssnumber>
<xsd:element name="Name" type="xsd:string"/>
<xsd:element name="DateOfBirth" type="xsd:date"/>


<xsd:element name="EmployeeType" type="xsd:emptype"/>


<xsd:element name="Salary" type="xsd:int"/>
</xsd:sequence>
</xsd:complexType>
</xsd:element>
<xsd:simpleType name="ssnumber">
<xsd:restriction base="xsd:string">
<xsd:length value="11">
<xsd:pattern value="\d{3}\-\d{2}\-\d{4}"/>
</xsd:restriction>
</xsd:simpleType>


<xsd:simpleType name="emptype">
<xsd:restriction base="xsd:string">
<xsd:enumeration value="fulltime"/>
<xsd:enumeration value="parttime"/>
</xsd:restriction>
</xsd:simpleType>


</xsd:schema>

In the above example, the child element name "EmployeeType" of parent element "Employee" is defined as user defined data type "emptype".
The Simple Type element "emptype" is declared outside the Employee element which is global to elements that fall under <xsd:schema>
So we have defined two simple element types: one is emptype, which basically restricts the value within two enumerated values "fulltime" or "parttime". And another is "ssnumber" which restricts the length of the value to 11 and it should be of "111-11-1111" pattern.
I highlighted the words "enumerated" "length" and "pattern" to emphasize that those words are referred to as Facets.
In XSD Schema, facets provide the flexibility to add restriction for a given base data type. In our examples above, the base data type specified is "string".
Similarly, facets are available for other data types like "int". A few facets available for "int" data type are Enumerated, Minexclusive, Mininclusive, and Pattern.
Let's consider a new requirement. The payroll company wants to process tax information, so they want the employee information which is listed above plus the employee's state and zip code information. All the information should be under the separate header "EmployeeTax".
The above requirement compels us to restructure the schema.
First we will break down the requirement to make it simple.
a. Payroll Company wants all the information listed under "Employee" element.
b. Payroll Company wants state and zip of the given Employee.
c. Payroll company wants (a) and (b) in a separate header "EmployeeTax"
Fortunately XSD Schema supports object-oriented principles like Inheritance hierarchy. This principle comes handy in our requirement.
The following structure can quite easily accomplish the above requirement.

<xsd:complexType name="EmployeeTax"
minOccurs="0"
maxOccurs="unbounded">


<xsd:complexContent>
<xsd:extension base="xsd:Employee">


<xsd:sequence>
<xsd:element name="state" type="xsd:string"/>
<xsd:element name="zipcode" type="xsd:string"/>
</xsd:sequence>


</xsd:extension>
</xsd:complexContent>


</xsd:complexType>
</xsd:schema>

In the above code, we started with the name of the Complex Type, which is "EmployeeTax".
The following line is very important. It tells the XML Parser that some portion of EmployeeTax content is getting derived from another Complex Type.

<xsd:complexContent>

To refresh our memory, in simple element type definitions, we used restriction base, which mapped to base data types. In the same way, we need to specify the restriction base for the complex content. The restriction base for complex content should logically be another Complex Type. In our example it is "Employee".

<xsd:extension base="xsd:Employee">

Once the extension base has been defined, all the elements of the "Employee" element will automatically inherit to EmployeeTax Element.
As part of the business requirement, the state and zip code elements are specified which completes the total structure for EmployeeTax Element.
Referencing External Schema
This feature is very useful in situations where one schema has functionality that another schema wants to utilize.
Take a case where the payroll company for ABC Corp. needs some information about the Employers, such as EmployerID and PrimaryContact in a separate XML document.
Assume EmployerID format is the same as Employee SSN format. Since we have already defined the validation for Employee SSN, there exists a valid case for using the Employee schema.
The first step in using different schema is to "include" the schema.
To include the schema, make sure the target namespace is the same as your current working location.

<xsd:schema xmlns:xsd="http://www.w3.org/2001/XMLSchema"
targetNamespace="http://www.abccorp.com">
<xsd:include schemaLocation="employee.xsd"/>


<xsd:element name="Employer"
minOccurs="0"
maxOccurs="unbounded">
<xsd:complexType>
<xsd:sequence>


<xsd:element ref ="ssnumber"/>


<xsd:element name="PrimaryContact"
type="xsd:string"/>


</xsd:sequence>
</xsd:complexType>
</xsd:element>
</xsd:schema>

Please note the include statement, which references the schema location. Make sure the employee.xsd file exists in the same target namespace location.
Once included, the "Employer" element references the ssnumber global element in the same manner as it had been declared within the document itself. Then an additional primary contact element, which is specific to "Employer" element, is defined after the ssnumber element reference.
Annotations
Comments have always been considered a good coding convention. XSD Schema provides a commenting feature through the <Annotation> element.
The <Annotation> element has 2 child elements.
  • <documentation>
  • <appInfo>
<documentation> element provides help on the source code in terms of its purpose and functionality.
<appinfo> element provides help to the end users about the application.
The following schema describes the usage of the Annotation element.

<xsd:schema xmlns:xsd="http://www.w3.org/2001/XMLSchema">
<xsd:element name="Employee"
minOccurs="0"
maxOccurs="unbounded">
<xsd:complexType>
<xsd:sequence>
<xsd:element name="SSN="xsd:ssnumber>


<xsd:annotation>
<xsd:documentation>
The SSN number identifies each employee of ABC CORP
</xsd:documentation>
<xsd:appInfo>
Employee Payroll Info
</xsd:appInfo>
</xsd:annotation>


<xsd:element name="Name" type="xsd:string"/>
<xsd:element name="DateOfBirth" type="xsd:date"/>
<xsd:element name="EmployeeType" type="xsd:emptype"/>
<xsd:element name="Salary" type="xsd:int"/>
</xsd:sequence>
</xsd:complexType>
</xsd:element>
<xsd:simpleType name="ssnumber">
<xsd:restriction base="xsd:string">
<xsd:length value="11">
<xsd:pattern value="\d{3}\-\d{2}\-\d{4}"/>
</xsd:restriction>
</xsd:simpleType>
<xsd:simpleType name="emptype">
<xsd:restriction base="xsd:string">
<xsd:enumeration value="fulltime"/>
<xsd:enumeration value="parttime"/>
</xsd:restriction>
</xsd:simpleType>
</xsd:schema>

Conclusion
I tried to cover a few interesting features of XSD Schema. But there is a whole lot of information about XSD schema in

※ 참고사이트 : http://anatech-oracle.blogspot.kr/

Posted by 아도니우스
2014. 9. 17. 09:29

Oracle SOA 11g - Configure transaction timeout for BPEL.

1. Setting the SyncMaxWaitTime :

2. Setting the global transaction timeout at Weblogic Domain Level:

3. Overriding the transaction timeout setting for BPEL EJB's

   1) Log into Oracle Weblogic Administration Console

   2) Click Deployments

   3) Expand soa-infra -> EJBs

   4) Click on the configuration tab for the timeout setting for each of EJB;s listed below and the change the time out values as required

   5) Click Save

   6) Restart Oracle Weblogic Server


※ 참고사이트 :  http://www.albinsblog.com/2011/11/oracle-soa-11g-configure-transaction_20.html


Posted by 아도니우스
2014. 9. 16. 17:58

 1. SOA WSDL Caching

 1. oracle.as.soainfra.config->Server:aiaSvr#1->SoaInfraConfig->soa-infra->Operations->validate

2. oracle.as.soainfra.config->Server:aiaSvr#1->SoaInfraConfig->soa-infra->Attributes->UddiCacheLifetime

   -> There is Attribute "UddiCacheLifetime" defining the external WSDL cache time. By default, the value is set to 24hours and the minimum time of 300s could be set.


참고사이트 : http://www.albinsblog.com/2012/09/configuring-caching-of-wsdl-urls.html


 2. MDS Cache

 1. System MBean Brower -> Application Defined MBeans -> oracle.mds.lcm -> Server: soa_server1(whatever names u gave while installation of SOA) -> Application: soa-infra -> MDSAppRuntime -> Operations tab -> clearCache


참고사이트 : https://community.oracle.com/thread/1010030?tstart=0

Posted by 아도니우스
2014. 9. 16. 08:32

From a first glimpse myself I have the following impressions:

  • The book gives a very good overview of the various topics of Performance Tuning
  • A lot of recommendations are very valuable and show that the authors have real project experience
  • My feeling is though that it concentrates a little bit too much on the low level infrastructure (like JVM tuning) and its config settings instead of explaining the why and what to tweak. Example: reducing audit level may help – but can also impact monitoring capabilities during production.
  • Even though it touches database tuning, the book underestimates the need of database performance monitoring, database tuning, of regular purging and of tuning to prevent data growth. This often is a major area which leads to performance problems if not addressed in an early stage. For example no word about using Secure File LOBs for reducing HW contention in the DB….
  • Architectural decisions are not mentioned– like splitting up one SOA domain into multiple ones for various reasons.
  • SOA monitoring chapter promotes and focuses Hyperic as a product and misses out Oracle Grid Control and other available solutions.
  • Design-level tuning covers only BPEL. Often one key area of performance tuning is to choose the right SOA component for a requirement. For example to use OSB
  • A few components are not covered, for example Mediator resequencer, OHS tuning, XREFs and DVMs.


For some recommendations however, you should be careful to follow them without validation. Just one example:

“The adapter.jms.receive.threads, adapter.aq.dequeue.threads, and InboundThreadCount properties set the number of threads available for processing JMS,
AQ, and MQ messages. The default value for these is 5, and performance can be improved by using more threads to dequeue messages from these providers.”

First, the default for “adapter.jms.receive.threads” is 1. Secondly, as an experience from real world complex deployments in large clusters, the right number of consumers should be determined by the expected load and for example the message size (potentially triggering different transaction times). Last but not least, in a cluster, each JMS consumer thread is multiplied by the number of cluster nodes. Therefore you should be very careful to increase JMS Adapter receive threads. I have seen performance tests where we proved that throughput increased dramatically by decreasing the number of JMS receive threads…

As a summary, the book provides some good add on’s to the standard documentation available in the Oracle Fusion Middleware Performance and Tuning Guide.
Get a copy, check them out and tune your SOA 11g environment!


참고사이트 : http://stefankoser.blogspot.kr/2013/09/new-book-about-soa-11g-performance.html

참고사이트 : https://www.packtpub.com/books/content/performance-tuning-%E2%80%93-systems-running-bpel-processes


Part 1 - Principles of Performance Tuning

Part 2 - Diagnosing and tuning performance problems in the java Virtual Machine

Part 3 - Tuning and Scaling WebLogic

Part 4 - Oracle Service Bus Performance

Part 5 - Oracle BPEL Performance Best Practices

Part 6 - Monitoring SOA Suite with Oracle Enterprise Manager

Posted by 아도니우스
2014. 9. 16. 07:45

Up to release 11.1.1.5 there have been 4 thread pools in Oracle SOA Suite 11g to control parallelism of execution:

1. Invoke Thread Pool ( for asynchronous invocations)

2. Engine Thread Pool ( for callback execution)

3. System Thread Pool

4. Audit Thread Pool

'SOA' 카테고리의 다른 글

SOA WSDL Caching in SOA Server && MDS Cache referesh  (0) 2014.09.16
SOA 11g Performance Tuning  (0) 2014.09.16
SOA Infrastructure  (0) 2014.09.11
COMPOSITE_INSTANCE  (0) 2014.09.03
EAI관점에서 본 SOA  (0) 2014.09.01
Posted by 아도니우스